How to Remove 3D Print Supports Easily?
How to Remove 3D Print Supports Easily?
Removing supports is one of the most common challenges faced by 3D printing enthusiasts, especially when
working with large-format 3D printers. While supports are essential for achieving complex geometries and
overhangs, the process of taking them off can be frustrating, time-consuming, and sometimes damaging to
the final print.
In this guide, we'll explore practical strategies to remove supports efficiently while keeping your prints in perfect
shape.
Understanding 3D Print Supports
Supports are temporary structures that hold up parts of your model during printing. On professional 3D printers
or large-format 3D printers, the stakes are higher because the size of the print means more material and heavier
structures. Removing these supports improperly can lead to surface damage, stress marks, or even breakage of
delicate features.
The difficulty of removal depends on multiple factors:
Support type: Tree-like, grid, or linear supports each require different approaches.
Material/filament: The type of filament you use can affect how brittle or flexible the supports are.
Print settings: Layer height, support density, and extrusion width all influence how easily supports can be detached.
Understanding these variables will save you hours of post-processing frustration.
Tools You'll Need
Having the right tools makes the process safer and faster. Some essential tools include:
Flush cutters or diagonal pliers: Ideal for cutting away larger support sections.
Tweezers: Perfect for reaching tight spaces and removing fine strands.
Scrapers or spatulas: Useful for flattening surfaces or lifting supports from flat areas.
Sanding tools: Fine-grit sandpaper or sanding sticks help smooth surfaces after support removal.
Safety gear: Gloves and protective eyewear are recommended when working with sharp tools.
Even when using professional 3D printers, having these tools on hand is key to reducing print damage and
achieving a smooth finish.
Step-by-Step Guide to Removing Supports
1. Let the Print Cool
Large-format 3D prints often retain heat for a long time. Removing supports while the print is still warm can make
the filament more prone to stretching or tearing. Always allow your model to cool completely before starting
post-processing.
2. Start with Large Sections
Use flush cutters to remove large support structures first. Work from the outside in and try to leave a small gap
between the support and the print surface to avoid accidentally cutting into your model.
3. Handle Delicate Areas Carefully
For thin walls, intricate details, or overhangs, tweezers or small pliers are ideal. Patience is key—rushing can cause
breakage or leave marks on the final piece.
4. Sand and Finish
After removing the bulk of the supports, use fine sandpaper to smooth any rough areas. For professional 3D prints,
this step is crucial for a clean, polished appearance. Some users even slightly warm the filament and lightly scrape
the surface to remove stubborn remnants.
5. Optional Soluble Supports
If your large-format 3D printer supports dual extrusion, consider using soluble supports. This can dramatically reduce
manual post-processing time. Simply dissolve the support in water or a suitable solvent, leaving your model pristine.
Common Pain Points and How to Solve Them
Stringing or small leftover fragments: Adjust support density and extrusion width during slicing.
Support fused to the model: Lower the support interface density or use a different support pattern.
Breaking delicate details: Use tweezers, patience, and consider soluble supports for intricate models.
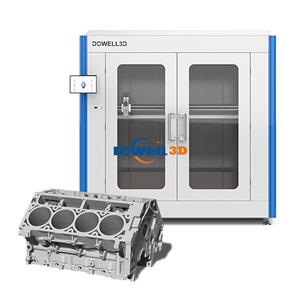
Using a high-quality professional 3D printer, like a large-format 3D printer from Dowell 3D, can minimize these issues.
The precise filament flow, strong build platform, and stable frame help ensure supports are easier to remove without
damaging your prints.
Final Tips
Always inspect your print in good lighting to identify fragile areas before removal.
Keep tools organized and clean—they work better and reduce the risk of damage.
Practice makes perfect. Over time, you'll develop a sense of how different filaments behave and how much force is
safe to apply.
Removing supports doesn't have to be a headache. With the right approach, tools, and a professional 3D printer,
you can achieve clean, flawless prints even on large-format models.